Publish your website as a public secured service
Requirements
- read the previous chapter deploy abcdesktop on GCP with Kubernetes
- a GCP account
- a domain of you own hosted on GCP
gcloudcommand line interface gcloud clikubectlcommand line
To get more informations
- read the google cloud chapter install-gke-ingress-controller
Overview
In this chapter we are going to, use a gke-ingress-controller to host your abcdesktop service with a public IP Address, then configure dns zone file to use your own domain name, and activate TLS to secure your service.
Set up the GKE Ingress controller
In this example we will use the GKE built-in ingress controller. Before starting you may first need to check if the HttpLoadBalancing add-on is enabled on your cluster.
Go to your cluster page on the GCP console, then Networking, you should see HttpLoadBalancing as enabled, if not enable it and save your changes.

Create an ingress resource for GKE using the abcdesktop service and save it as abcdesktop_host.yaml
You need to update this manifest with your own FQDN, replace hello.ingress.gcp.pepins.net by your own values.
apiVersion: networking.k8s.io/v1
kind: Ingress
metadata:
  name: ingress-abcdesktop
  annotations:
    spec.ingressClassName: "gce"
spec:
  rules:
    - host: hello.ingress.gcp.pepins.net
      http:
        paths:
          - path: /
            pathType: Prefix
            backend:
              service:
                name: http-router
                port:
                  number: 80
We are using the spec.ingressClassName class to deploy an external application load balancer.
Apply the Ingress yaml file
NAMESPACE=abcdesktop
kubectl apply -f abcdesktop_host.yaml -n $NAMESPACE
You should read
ingress.networking.k8s.io/ingress-abcdesktop created
Verify the ingress resources:
NAMESPACE=abcdesktop
kubectl get ingress -n $NAMESPACE
The output looks similar to the following:
Wait fee seconds while the ADDRESS field is empty
NAME                 CLASS    HOSTS                          ADDRESS   PORTS   AGE
ingress-abcdesktop   <none>   hello.ingress.gcp.pepins.net             80      4s
When you obtain an IP ADDRESS
NAME                 CLASS    HOSTS                          ADDRESS         PORTS   AGE
ingress-abcdesktop   <none>   hello.ingress.gcp.pepins.net   35.190.86.108   80      3m14s
In the example above, the ingress resource tells gce to route each HTTP request that is using the / prefix for the hello.ingress.gcp.pepins.net host, to the route backend service running on port 80. In other words, every time you make a call to http://hello.ingress.gcp.pepins.net/, the request and reply are served by the echo backend service running on port 80.
Update your DNS zone file
We will associate your FQDN (Fully Qualified Domain Name) to the load-balancer's IP Address.
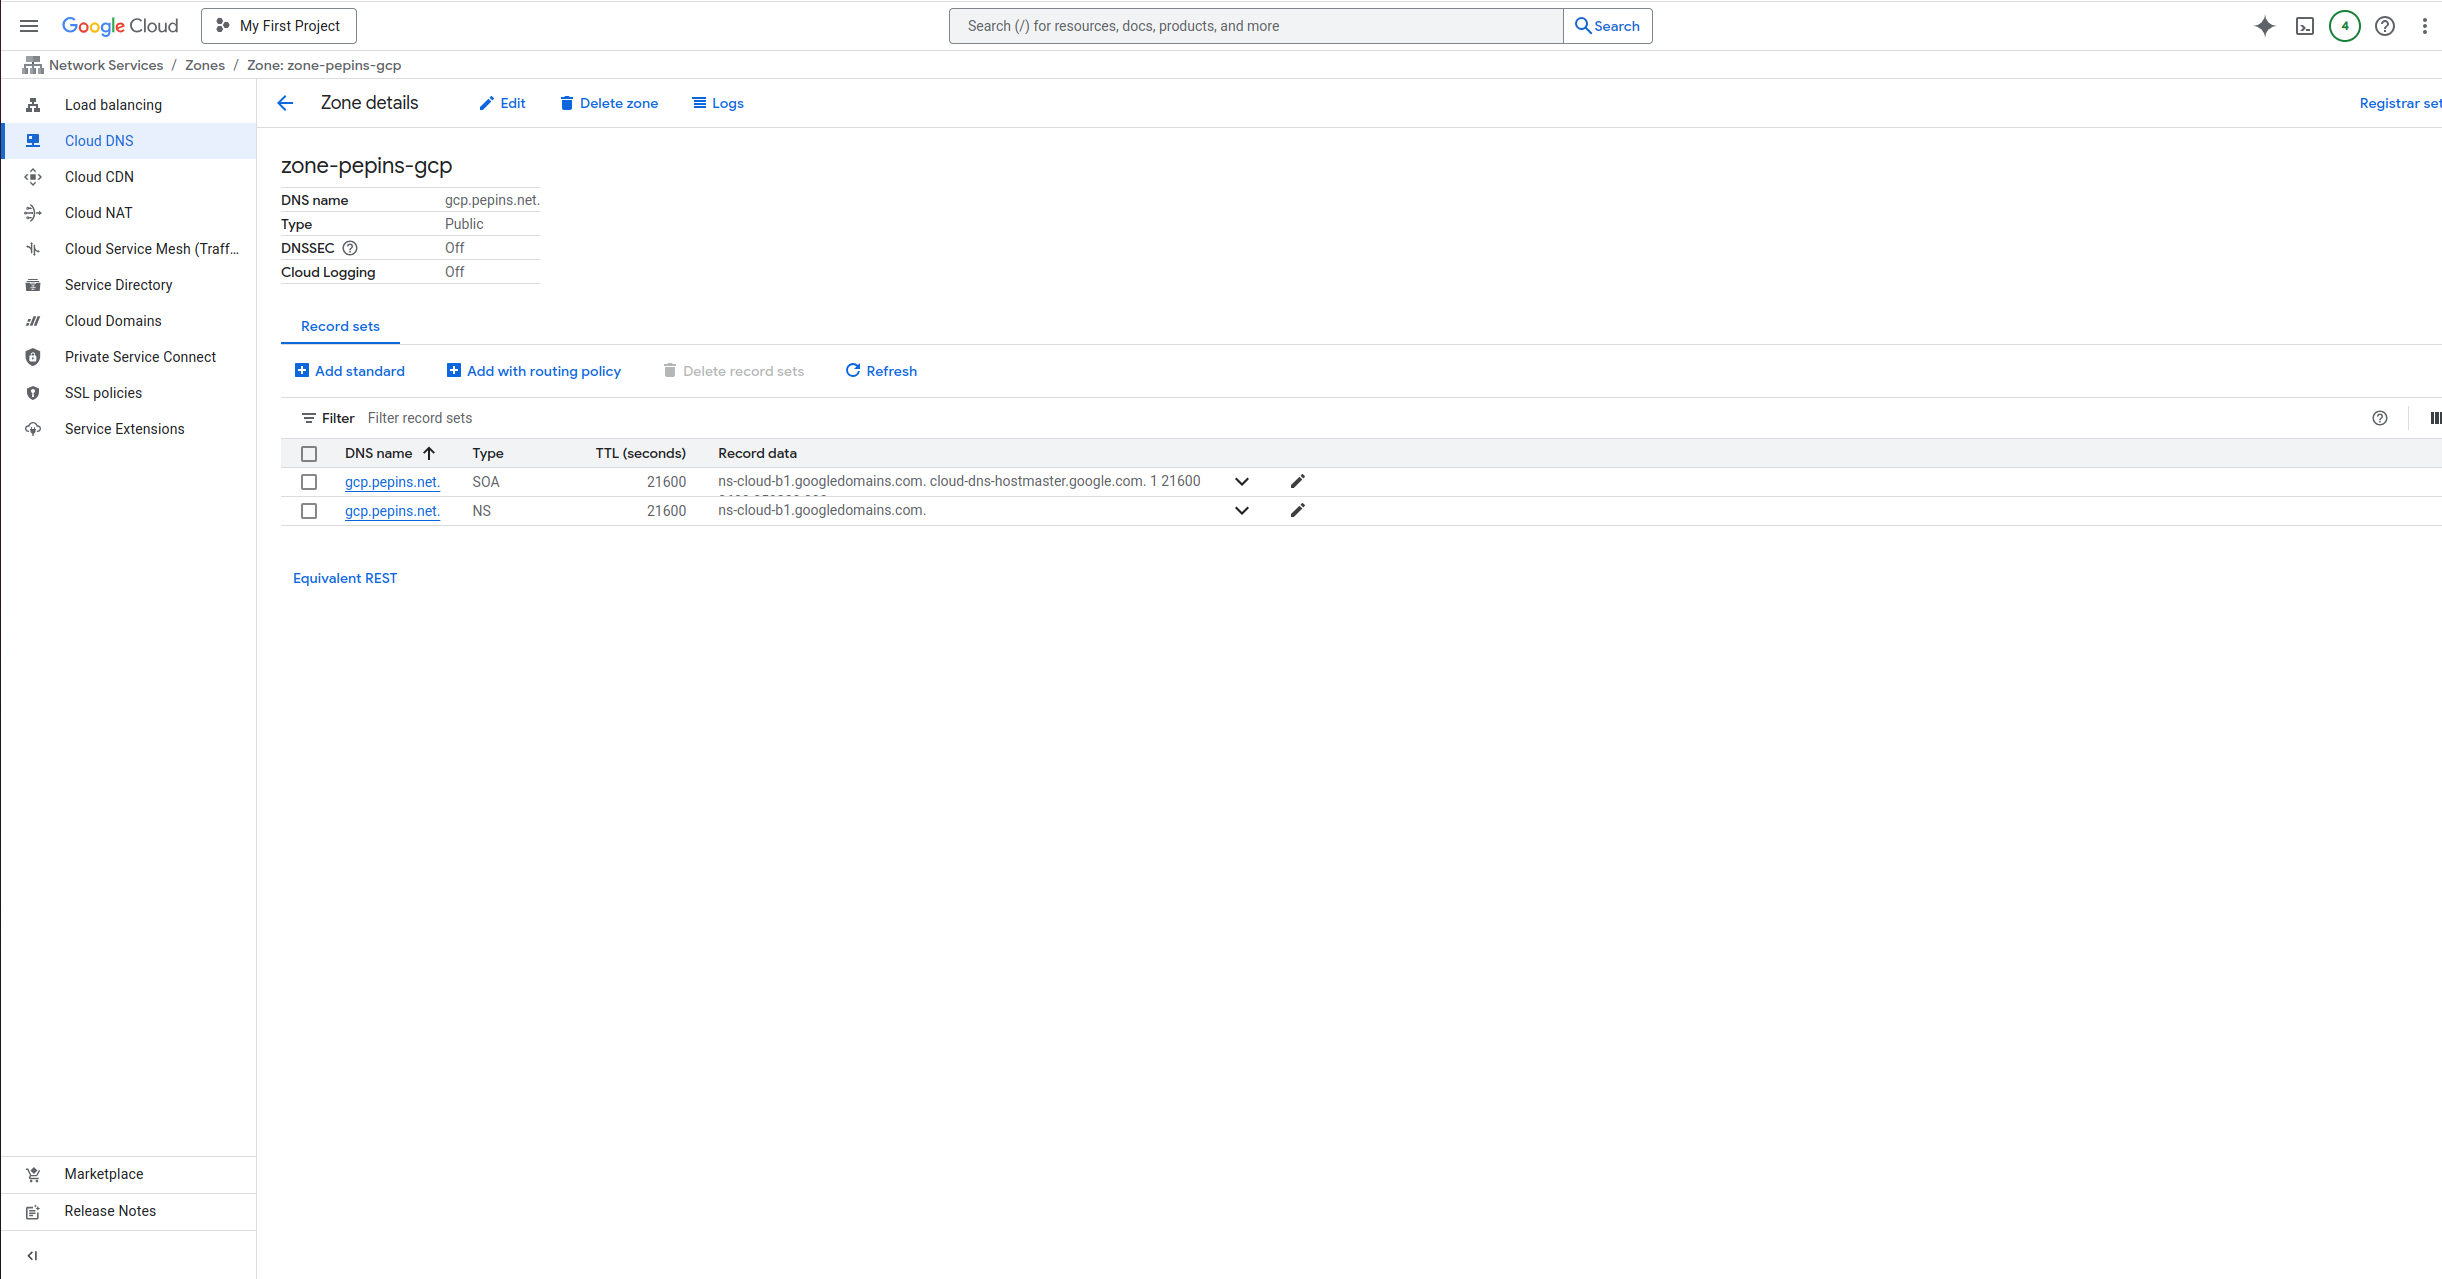
This screenshot describes the GCP network console. It shows the Domain informations, but you can manage your own zone file from your own registrar.
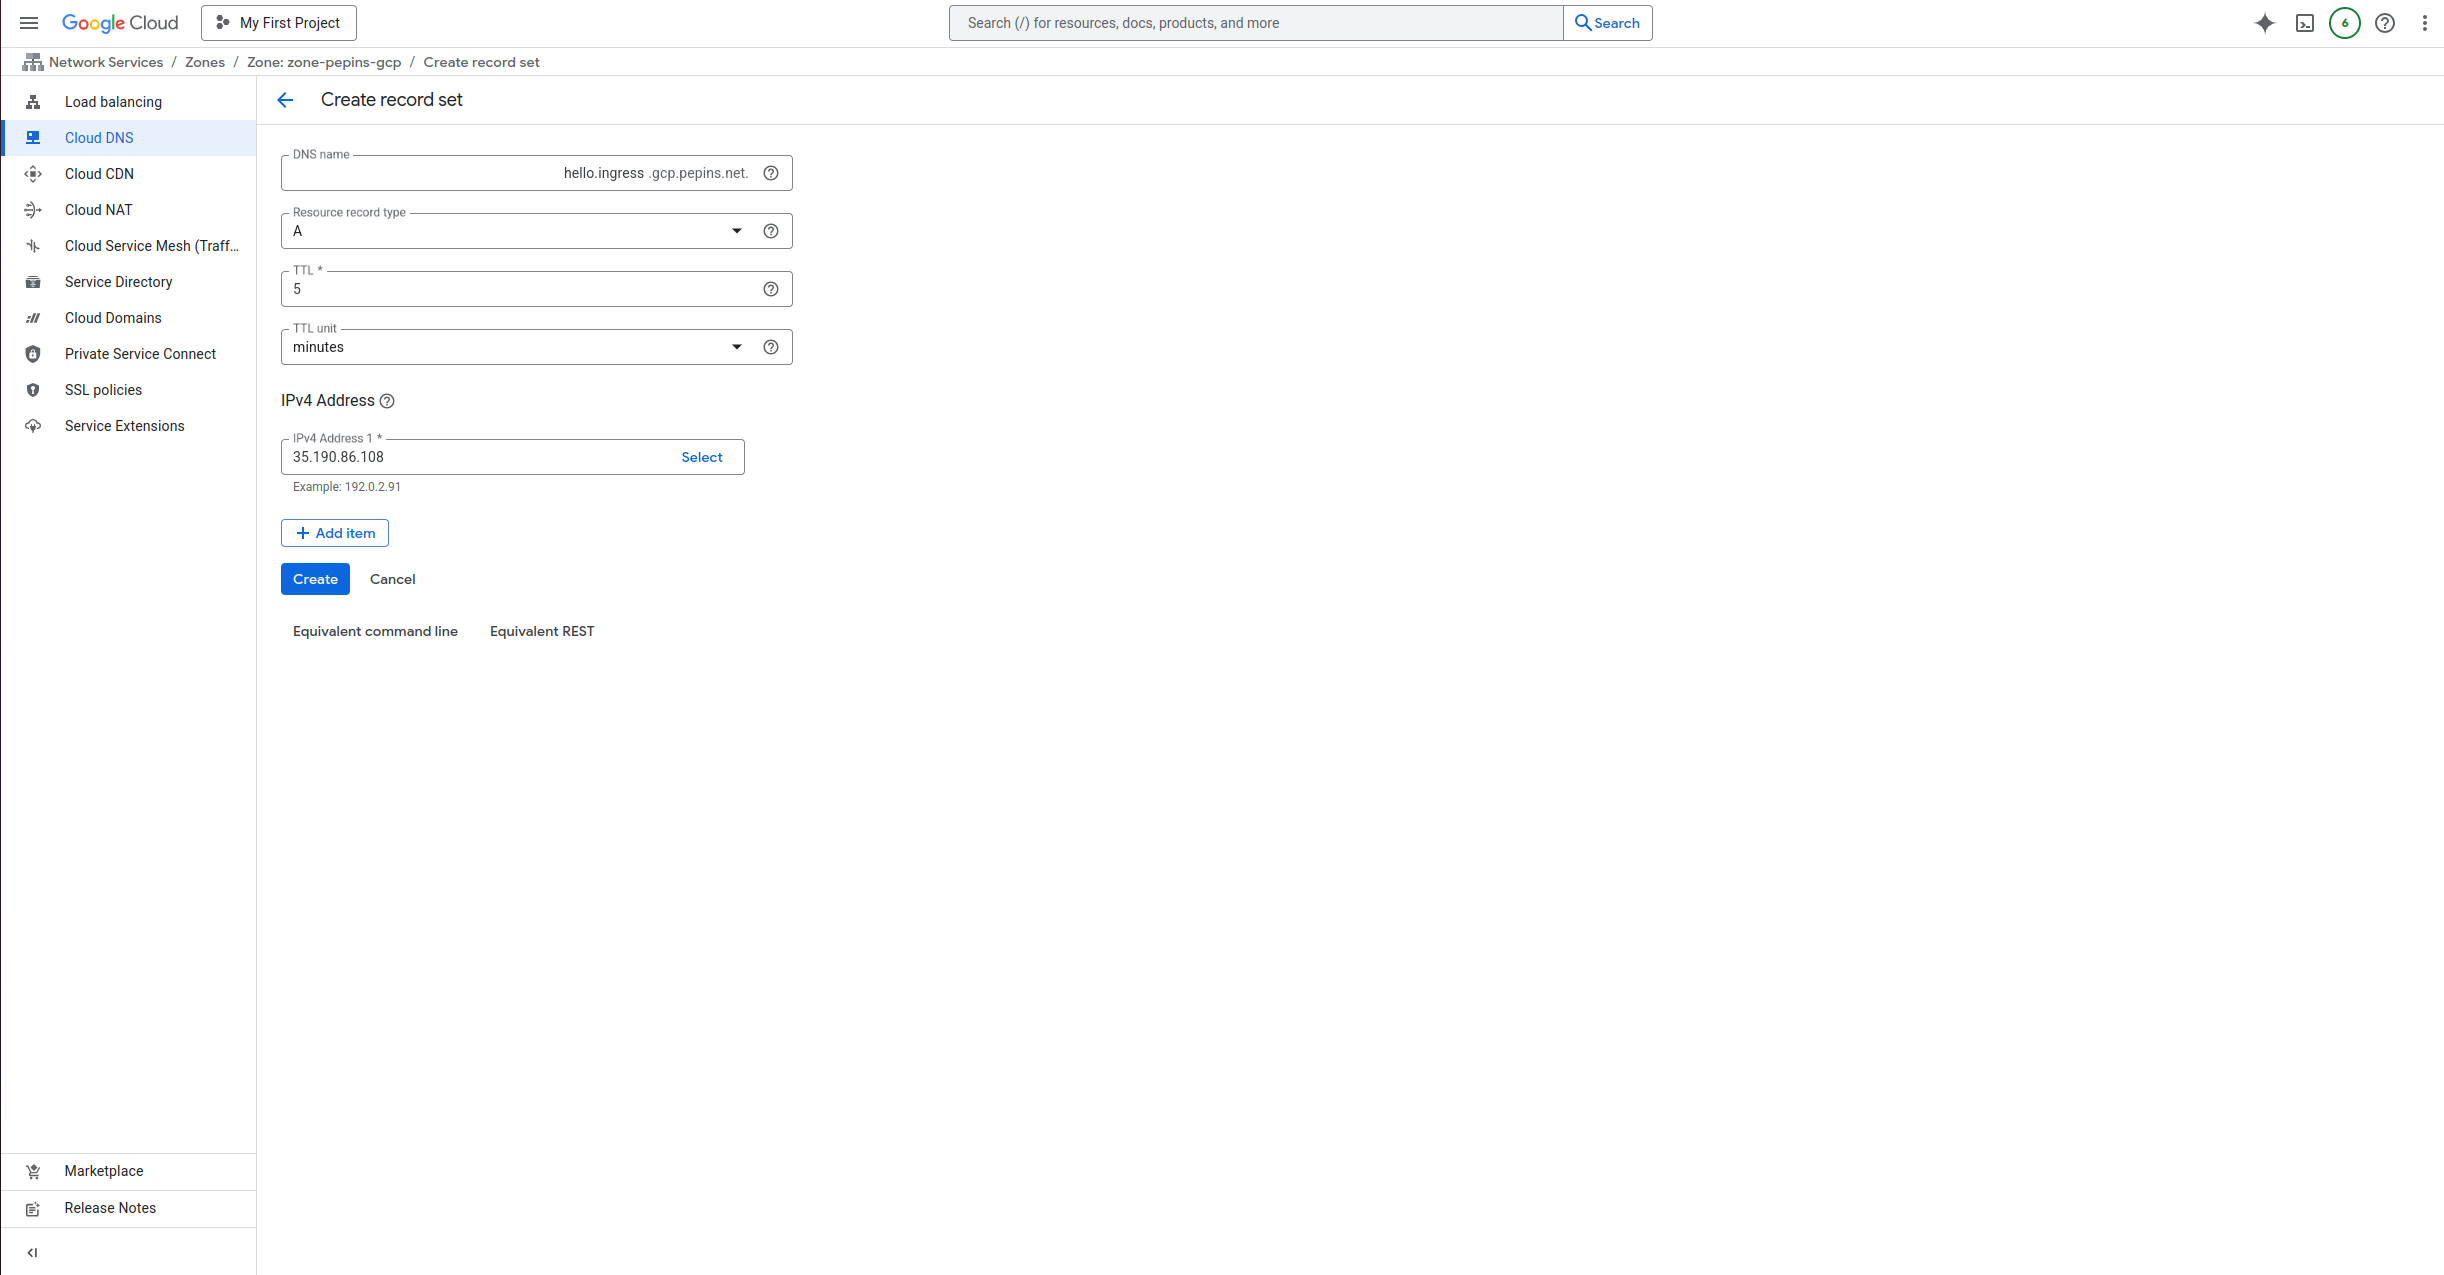
Create new record
In this example, we are going to create a new record hello.ingress (hello.ingress.gcp.pepins.net) to the A address 35.190.86.108. This IP Address is the load-balancer IP Address.
Press Add Standard button, to update your zone file with the new record
Then you should see your record on your domain page

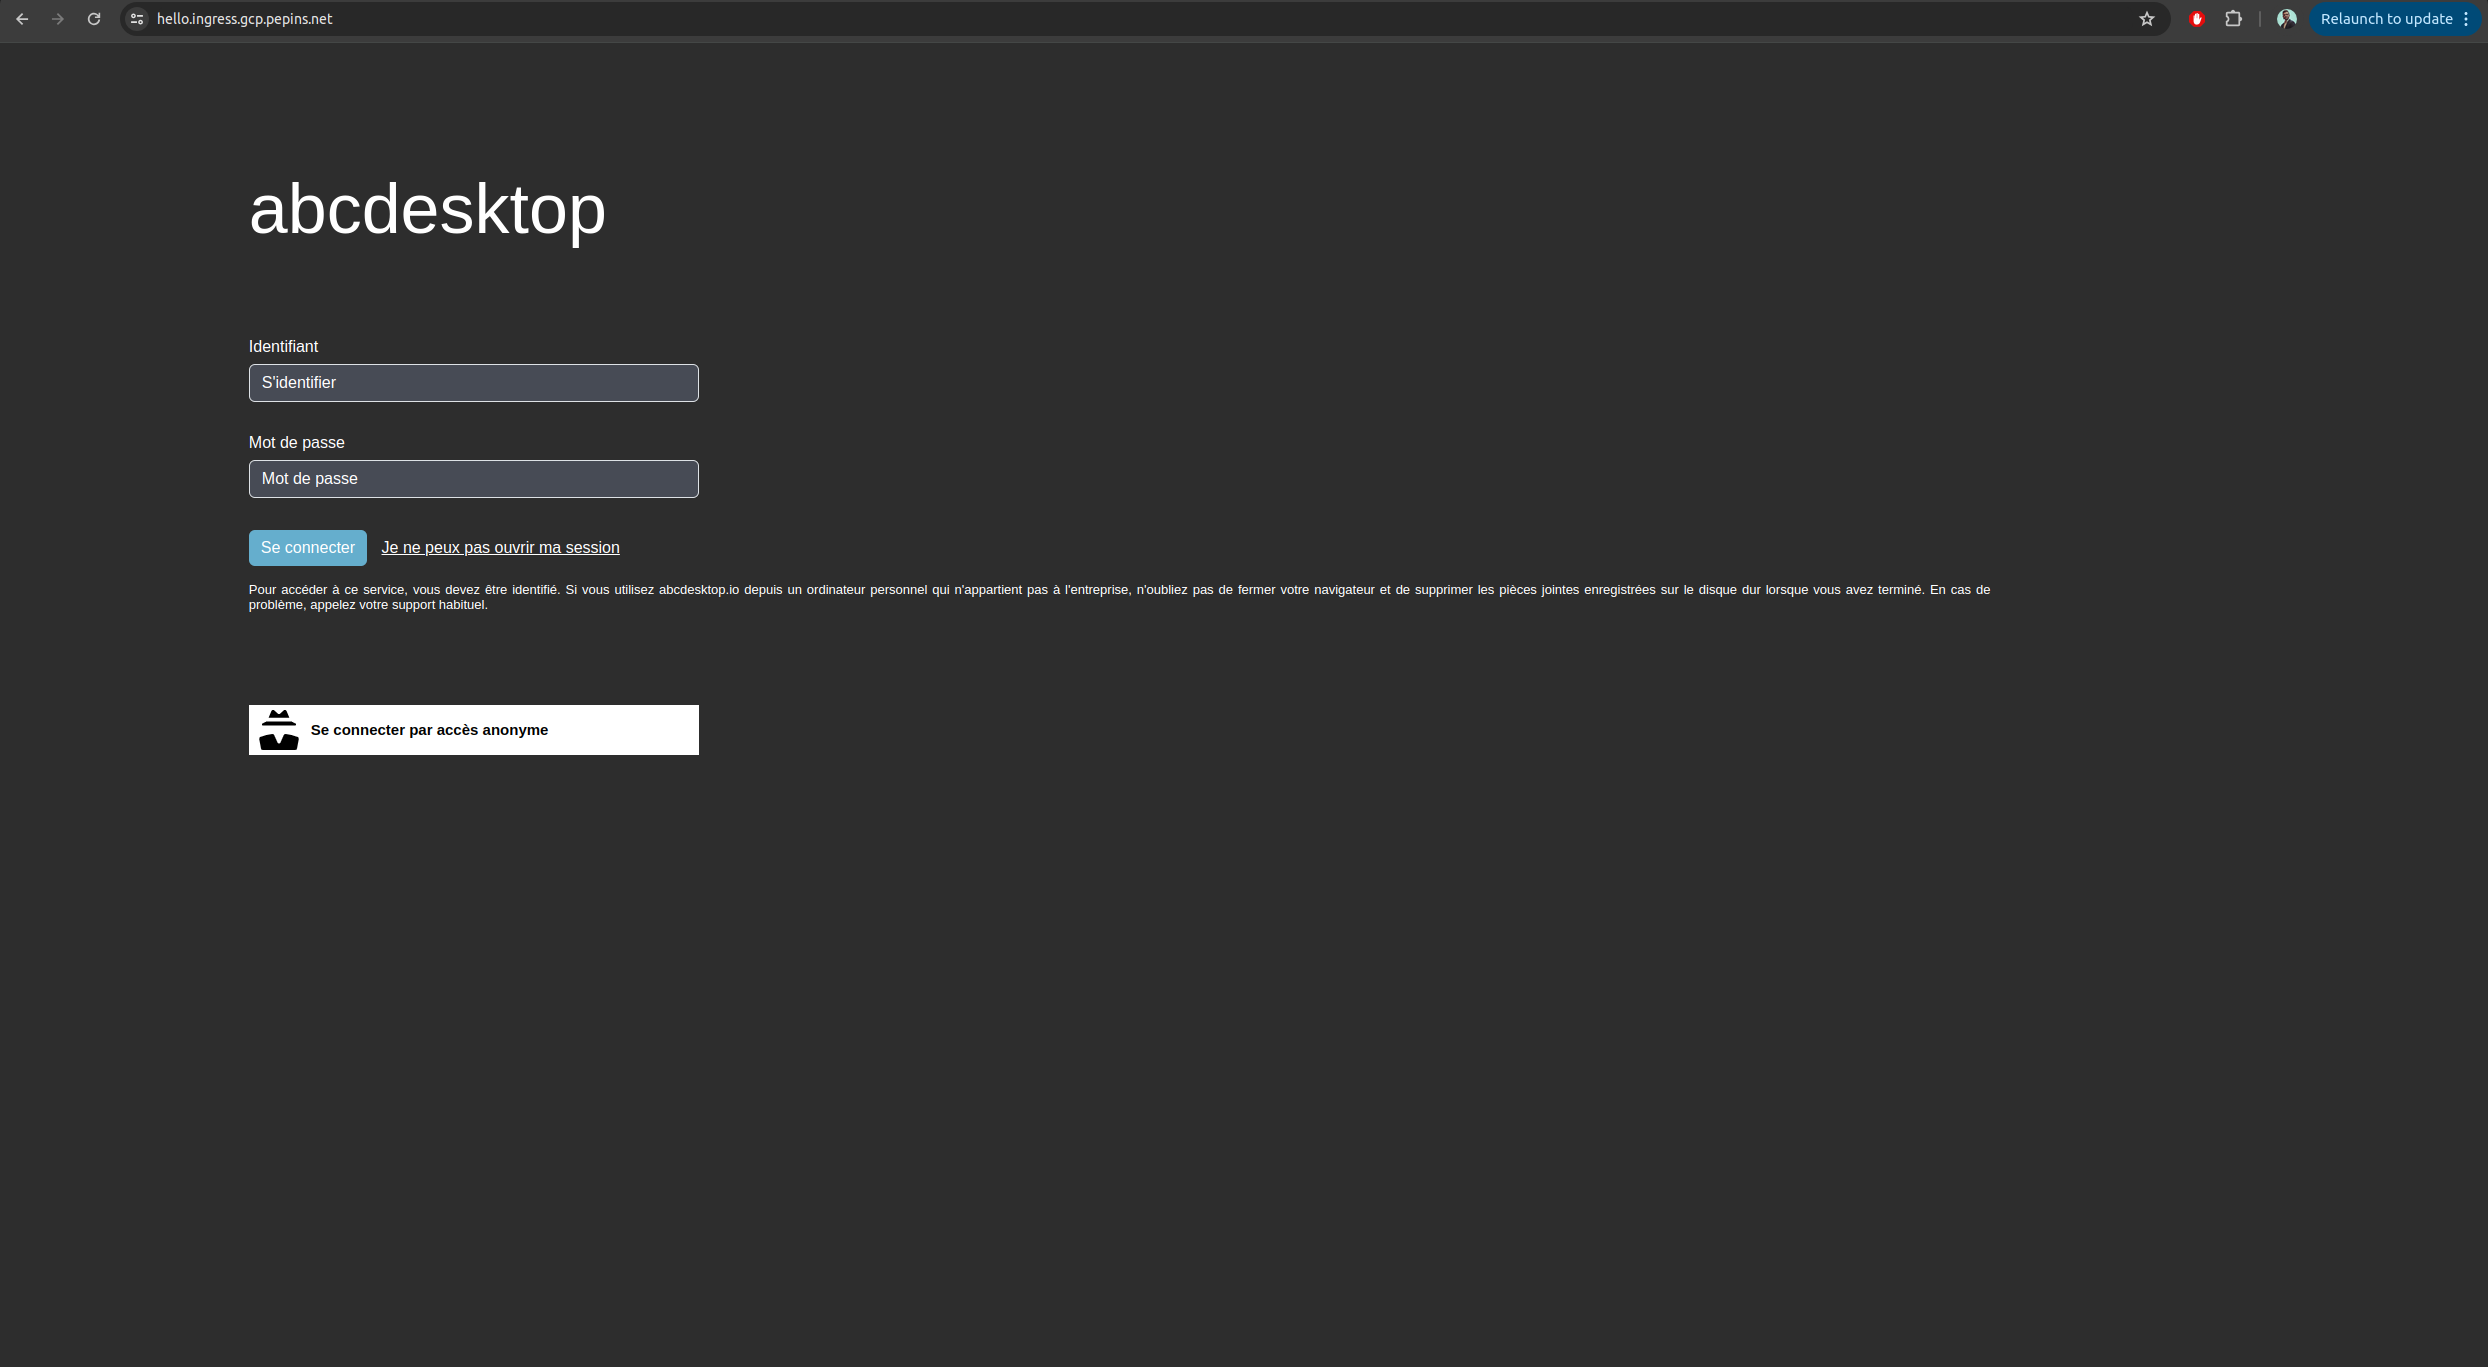
From your local device, you can open a web browser

Web browser doesn't allow usage of websocket without secure protocol. To login you need
httpsprotocol.
As you can see, your website is Not Secured, we are going to add X509 SSL certificate to secure your service.
Enable HTTPS
Configure Google-managed SSL certificates
To enable HTTPS on our exposed service, we will use Google-managed SSL certificates as it is natively embedded in GCP and works well with a GKE ingress controller.
First you will create a ManagedCertificate object, copy the following lines in a abcdesktop_managed_certificate.yaml file.
apiVersion: networking.gke.io/v1
kind: ManagedCertificate
metadata:
  name: abcdesktop-cert
spec:
  domains:
    - hello.ingress.gcp.pepins.net
Then apply it to the cluster.
NAMESPACE=abcdesktop
kubectl apply -f abcdesktop_managed_certificate.yaml -n $NAMESPACE
Now, you will have modify the previously created ingress file, and specify the managed certificate the ingress will use, in the annotations section.
apiVersion: networking.k8s.io/v1
kind: Ingress
metadata:
  name: ingress-abcdesktop
  annotations:
    spec.ingressClassName: "gce"
    networking.gke.io/managed-certificates: "abcdesktop-cert"
spec:
  rules:
    - host: hello.ingress.gcp.pepins.net
      http:
        paths:
          - path: /
            pathType: Prefix
            backend:
              service:
                name: http-router
                port:
                  number: 80
Then apply it to the cluster to start the certificate generation.
NAMESCAPE=abcdesktop
kubectl apply -f abcdesktop_host.yaml -n $NAMESPACE
You can check that the provisioning started by running the following command
NAMESCAPE=abcdesktop
kubectl get managedcertificate -n $NAMESPACE
NAME                AGE   STATUS
abcdesktop-cert     30s   Provisioning
After a few minutes, between 10 and 15, you will see that the status will change from Provisioning to Active.
NAMESCAPE=abcdesktop
kubectl get managedcertificate  -n $NAMESPACE
NAME                AGE   STATUS
abcdesktop-cert     12m   Active
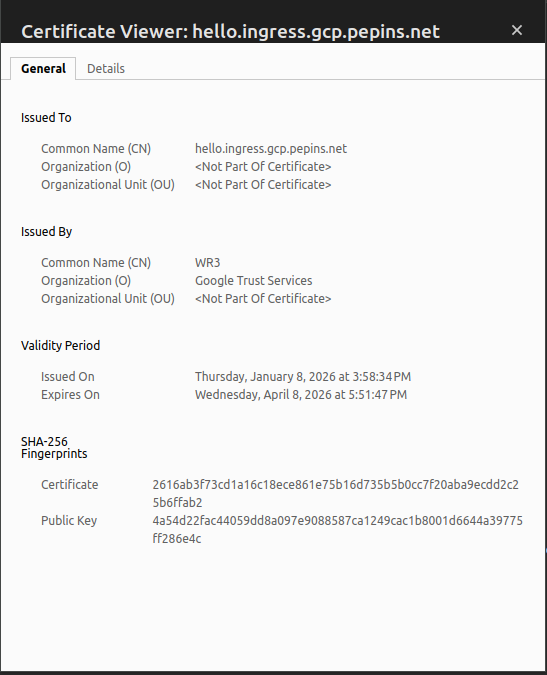
Reach your website using https protocol
You can now connect to your abcdesktop desktop pulic web site using https protocol.
The status is secured and we get some informations from the certificate
Increase ingress connection timeout
By default, GCE type ingress has a connection timeout of 30 seconds, in our case, we doesn't want abcdesktop to drop the connection to our desktop every 30 seconds, so we will have to increase timeout.
Unlike a nginx type ingress, you cannot add annotations to the ingress yaml file to increase timeout value. You instead need to create a BackendConfig object that you will link to your routing service.
First copy the following lines in a backend_config_timeout.yaml
apiVersion: cloud.google.com/v1
kind: BackendConfig
metadata:
  name: long-timeout-backend
spec:
  timeoutSec: 1800
Apply it to the cluster
NAMESPACE=abcdesktop
kubectl apply -f backend_config_timeout.yaml -n $NAMESPACE
Then you need to update the http-router service to use this long-timeout-backend config, copy the following lines in a http-router.yaml file.
kind: Service
apiVersion: v1
metadata:
  name: http-router
  labels:
    abcdesktop/role: router-od
  annotations:
    cloud.google.com/backend-config: '{"ports":{"80":"long-timeout-backend"}}'
spec:
  selector:
    run: router-od
  ports:
  - protocol: TCP
    port: 443
    targetPort: 443
    name: https
  - protocol: TCP
    port: 80
    targetPort: 80
    name: http
- Apply it to the cluster
NAMESPACE=abcdesktop
kubectl apply -f http_router.yaml -n $NAMESPACE
Now wait a few minutes for GCE to apply the new configuration and reconnect to your desktop, the connection shouldn't drop after 30 seconds anymore.
NB : By using this method with GKE ingress controller, the reverse proxy does forward the client source IP to your cluster, so there is no additional manipulations to do for that.